Sunday, May 31, 2009
FIRST MONDAY OF JUNE--SUPER ETSY SALE!!!
WOW! What happened to the month of May??? June is already here and it is time for the First Monday Sale event sponsored by the Etsy Texas Crafters Street Team! For the entire day, June 1, 2009, save 15% on your total purchase in all of my Etsy shops.
Please read my shop's announcement to get the full details!
Here are their links:
www.crazyforcollars.etsy.com all things pet related
www.joyfulfind.etsy.com all things vintage
www.spt2.etsy.com fun crafts and destash
Follow this link to see all the Etsy Texas Crafter's offerings:
http://www.etsy.com/forums_thread.php?thread_id=6170555
Tuesday, May 19, 2009
MEGA GARAGE SALE TIME AT THE COTNEY'S
Yes, we have officially declared this upcoming weekend as the time for a MEGA garage sale. Tom and I have cleaned out almost all of our closets, attics, cupboards, pantry, and various hiding places and now all I have to do is get it all organized and priced by Saturday. Luckily, our DD and SIL will be here Friday to help--plus bringing even more items for the big event.
Here's how our garage is looking today. I'll try to remember to post updates along the way...
Sunday, May 17, 2009
SPECIAL CREATIONS BY HAPPY, TALENTED CUSTOMERS!!!
I just love it when a "happy customers" send me pictures of the designs they created after purchasing one or more of my instructional eBooks. I thought that I should share their creations with you, my readers.
I'll start with Linda. She purchased my Crazy For Collars eBook and sent my the most inspirational pictures of her two-toned collar and leash sets. She is such a talented and creative person!
Katie also purchased the CFC eBook and take a look at the collar she created. She even commented that she "isn't a bowmaker". Great job, don't you think?
Katie also sent along a picture of the jean apron she created using my jeans-to-apron tutorial that I have posted on this blog. I just love how she embellished it!
Christy purchased my Ultimate Walking Vest eBook and made little Shilo the cutest outfit. I love the choice of colors she used for the vest.
Lastly, Cathy made her little Dixie this adorable tutu/walking vest using the UWV tutorial. I can't decide which is cuter--the tutu or Dixie!
Thanks for sharing everyone!
Saturday, May 16, 2009
HOW TO PRINT SMALL SHIPPING LABELS USING PAYPAL!
I love not having to make numerous trips to the post office any longer! Thanks to Paypal’s shipping, I am able to print out postage labels and have customer's purchases in my mailbox waiting for my postal person. I use smaller sized mailers for shipping most of my collars and love having the ability to generate smaller labels that fit my packages. Plus, they require less tape!!!
Here is my process—keep in mind, I use an Apple computer, Firefox as my browser, and a HP 6400 series printer. You may be able to skip several of my steps depending on your "equipment".
Before I started printing shipping labels I went in to Paypal’s MultiOrder Shipping and changed a few options:
Under Edit, scroll down and click on settings
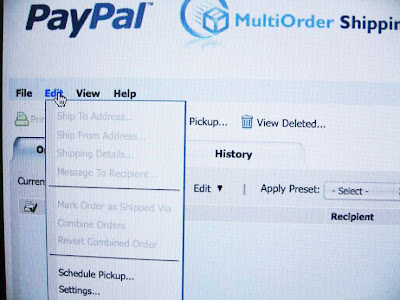
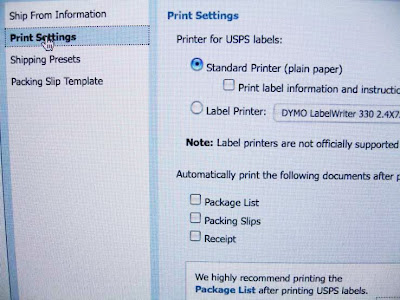
Once in Settings, choose Print Settings and make sure the ONLY OPTION CHECKED is Standard Printer. With everything else unchecked, you will only have the shipping label printed—NOTHING ELSE.
Let’s get started!! Here are my steps:
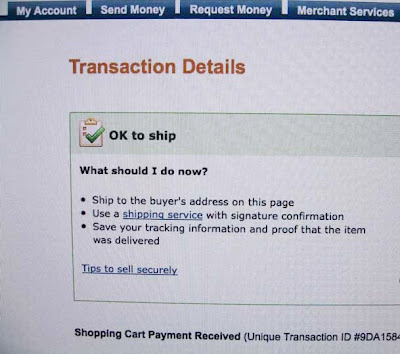
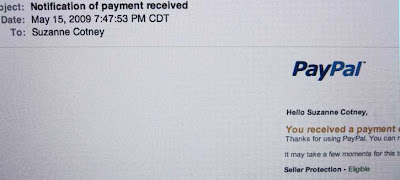
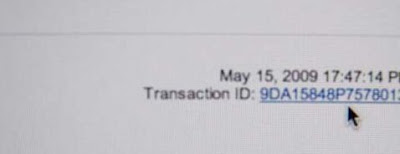
Step 1: When I sell an item on Etsy that requires payment via Paypal, I receive an email from Paypal that describes the transaction. I click on the transaction number to take me straight to the details on Paypal.
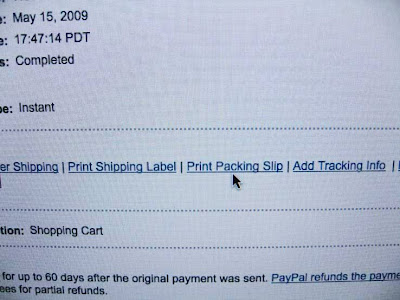
Step 2: towards the bottom of the Transaction Details page is a bar with several options. I always choose to print the Packing Slip first.
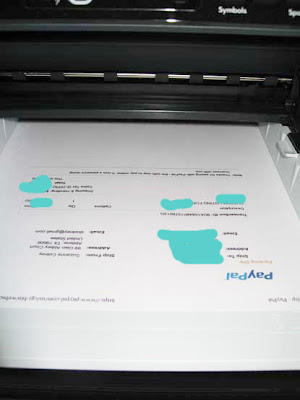
Step 3: I place my packing slip in my printer tray with the blank side DOWN and the blank end INSERTED towards the printer:
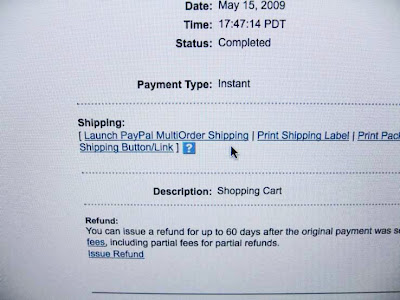
Step 4: Back to the same bar at the bottom of the details page, choose Launch MultiOrder shipping:
Once at the MultiOrder ship page, highlight the order you need to ship and enter the necessary information:
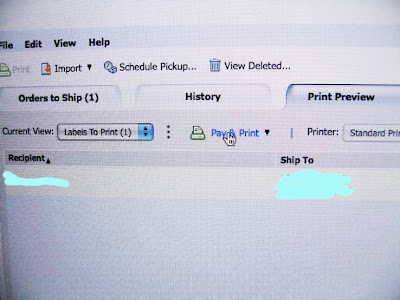
At the upper left of that page, click on the Print option--another page will open and choose the Pay and Print option as shown here:
At this point, a Pitney Bowes window will open with a sample picture of the shipping label, click on the Print Label option:
My printer setting page that opens does not have scaling (resizing) as an option, so I have to jump through a few hoops at this point—hopefully, yours is more user friendly…
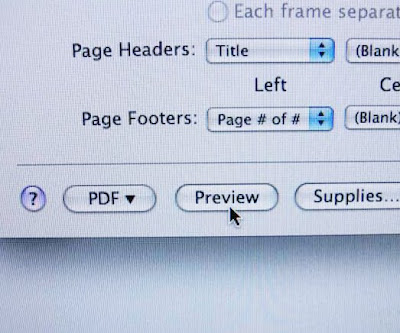
I have to choose the Preview option at the bottom and do my scaling in this round about way:
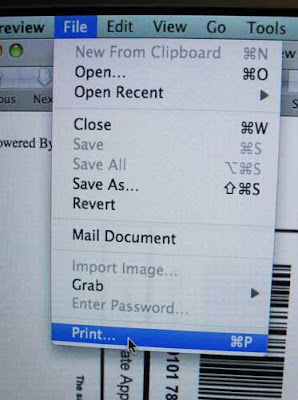
Once at the “Preview”, I choose the File tab at the top, and then Print:
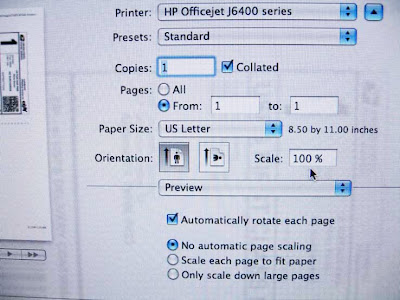
Another page opens that has the scaling option (yeah!). I change the 100% to 85%
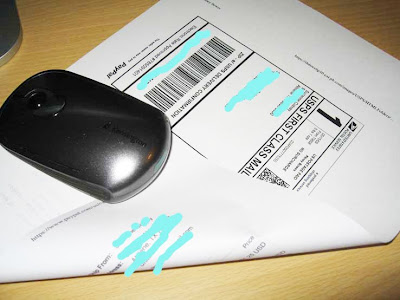
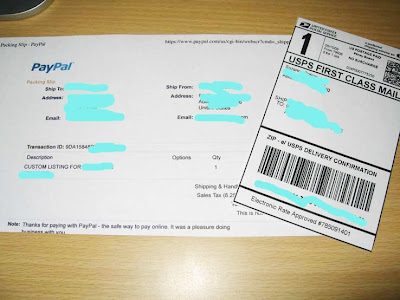
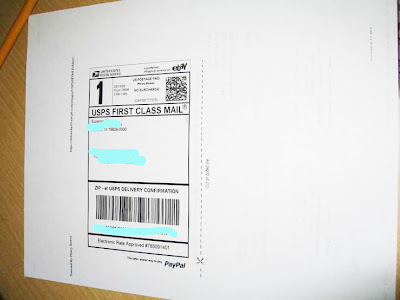
NOW I GET TO PRESS PRINT!!! The label prints out on the back of my packing slip!
I then cut out the shipping label and place it on the outside of the package and include the packing slip inside with the merchandise.
I realize that this was a super long post, but maybe someone learn a "new trick" by reading it. Please let me know if you can help me shorten my steps! I would love to hear from you!
Here is my process—keep in mind, I use an Apple computer, Firefox as my browser, and a HP 6400 series printer. You may be able to skip several of my steps depending on your "equipment".
Before I started printing shipping labels I went in to Paypal’s MultiOrder Shipping and changed a few options:
Under Edit, scroll down and click on settings
Once in Settings, choose Print Settings and make sure the ONLY OPTION CHECKED is Standard Printer. With everything else unchecked, you will only have the shipping label printed—NOTHING ELSE.
Let’s get started!! Here are my steps:
Step 1: When I sell an item on Etsy that requires payment via Paypal, I receive an email from Paypal that describes the transaction. I click on the transaction number to take me straight to the details on Paypal.
Step 2: towards the bottom of the Transaction Details page is a bar with several options. I always choose to print the Packing Slip first.
Step 3: I place my packing slip in my printer tray with the blank side DOWN and the blank end INSERTED towards the printer:
Step 4: Back to the same bar at the bottom of the details page, choose Launch MultiOrder shipping:
Once at the MultiOrder ship page, highlight the order you need to ship and enter the necessary information:
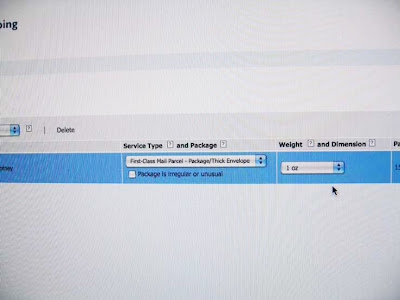
At the upper left of that page, click on the Print option--another page will open and choose the Pay and Print option as shown here:
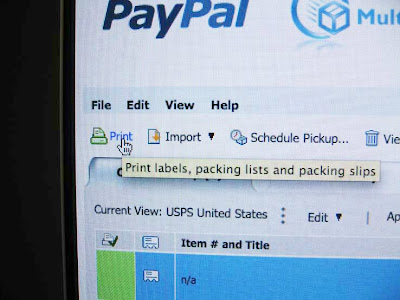
At this point, a Pitney Bowes window will open with a sample picture of the shipping label, click on the Print Label option:
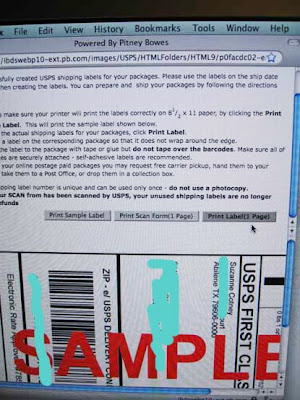
My printer setting page that opens does not have scaling (resizing) as an option, so I have to jump through a few hoops at this point—hopefully, yours is more user friendly…
I have to choose the Preview option at the bottom and do my scaling in this round about way:
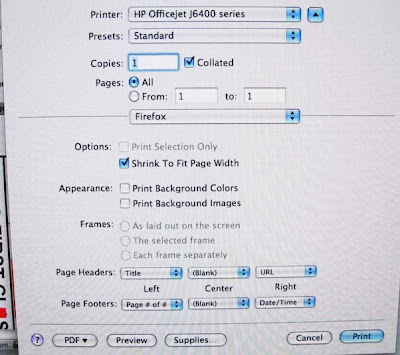
Once at the “Preview”, I choose the File tab at the top, and then Print:
Another page opens that has the scaling option (yeah!). I change the 100% to 85%
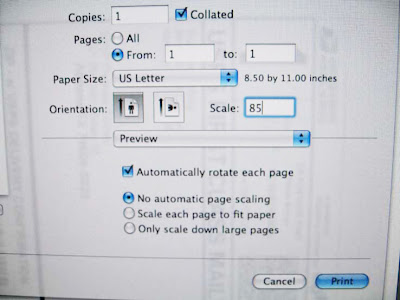
NOW I GET TO PRESS PRINT!!! The label prints out on the back of my packing slip!
I then cut out the shipping label and place it on the outside of the package and include the packing slip inside with the merchandise.
I realize that this was a super long post, but maybe someone learn a "new trick" by reading it. Please let me know if you can help me shorten my steps! I would love to hear from you!
Tuesday, May 12, 2009
MY SEWING STUDIO IN ITS STATE OF CHAOS!
I thought I would share some of my favorite things I use to make my dog collars and then I got carried away and started taking pictures of my studio without taking time to rearrange/hide any of the clutter. So look around and enjoy!
My favorite and only machine I now use for my collars is the Janome Memory Craft 1600P that I purchased in January. It "runs with the wind" and is an extra sturdy machine--I just love it for this application.
See the purple and lilac handle on my lip edge ruler in picture below? It is called "The Gypsy Gripper" and has made my life so much easier when cutting hundreds of strips of fabric with my rotary cutter. It is a "must have"!
Notice the big spool sitting to the right of my 1600P in the next photo--that is a 1.5 pound spool of monofilament thread that I have been using on all of my collars for the last several months. I'm wondering just how long it will last--years, probably!
Now take the rest of the tour of my studio:
LET'S GO TO LUCKENBACH TEXAS!
Thursday, May 7, 2009
MY NEW LABELS FINALLY ARRIVED AND IT IS HOT HERE!
I've been waiting and waiting for my postal person to deliver my labels I ordered via Ebay. They finally arrived and I have been adding them to all of my collars and tutus and vests! I'm so excited to get these little goodies!
Plus--It is hot here in "West Texas"!!! And it is supposed to be even HOTTER here tomorrow! What will July and August be like???? YIKES!!!
Wednesday, May 6, 2009
OOAK 2 TONE DOG COLLAR AND LEASH SETS
Recently, one of my customers who had purchased my Crazy for Collars tutorial sent me this picture of her very first creation:
She had custom created it for a friend's Boston terrier. Linda is a super creative gal and I am encouraging her to start a doggie couture business. I just know she would be very successful!
I decided to give the 2-tone set a try and am now hooked! I think they have turned out to be so cute! Here are my first two attempts:
I need to get them listed in my Etsy shop and start making more!
Hope you enjoy them!
Subscribe to:
Posts (Atom)